

Sometimes the user needs to protect their data written to the user memory against overwriting by someone else. We will show you how to do this in the following example.
This is how the memory is organized in the case of NTAG213:
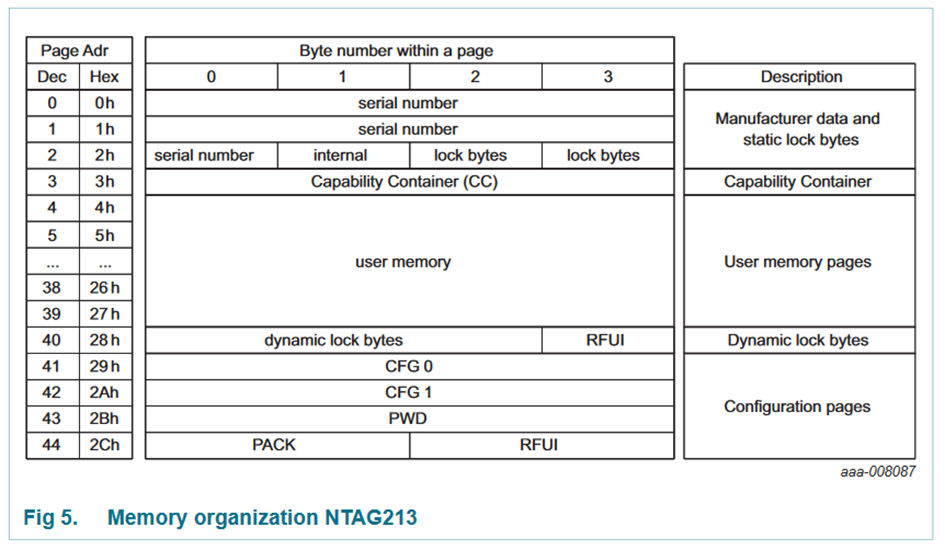
The memory organization for NTAG215 and NTAG216 is similar – just the user memory is extended.
Pages 29h to 2Ch for NTAG213, pages 83h to 86h for NTAG215 and pages E3h to E6h for NTAG216 are used to configure the memory access restriction and to configure the UID ASCII mirror feature. The memory content of the configuration pages is detailed below.
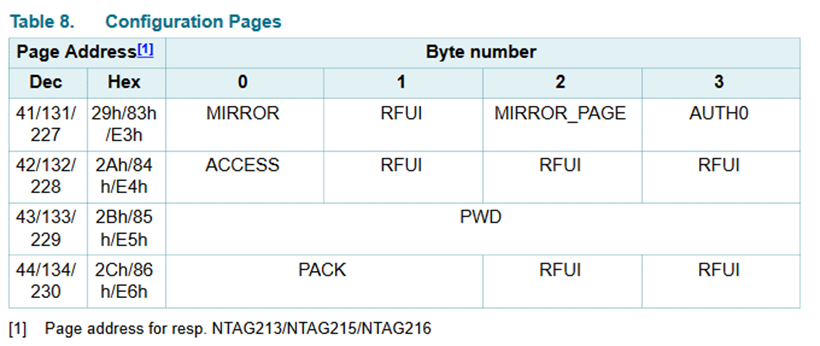
AUTH0 defines the page address from which the password verification is required. The valid address range for byte AUTH0 is from 00h to FFh. If AUTH0 is set to a page address which is higher than the last page from the user configuration, the password protection is effectively disabled.
In this example, we will show how to protect the user memory against writing, starting from page no. 9, so we will set AUTH0 to 09h.
First of all we will set a password. In this example we are going to use the Pepper C1 USB reader and the C1 Client PC app.
https://eccel.co.uk/product/pepper-c1-usb/
https://eccel.co.uk/wp-content/downloads/Pepper_C1/C1-client.zip
The screenshot below is showing the memory content of NTAG213 before setting a write protection. A screenshot made in the NFC TagInfo by NXP app (the official NXP app for smartphones).

Step 1 – Activate the tag:
Execute the Get tag count command to power and activate the tag:
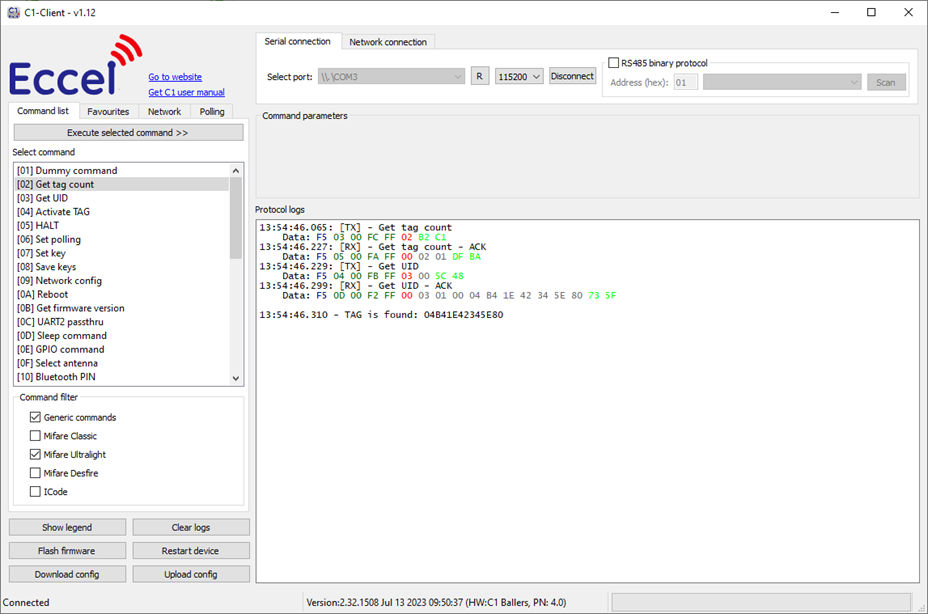
In this example, we have NTAG213 with UID = 04B41E42345E80.
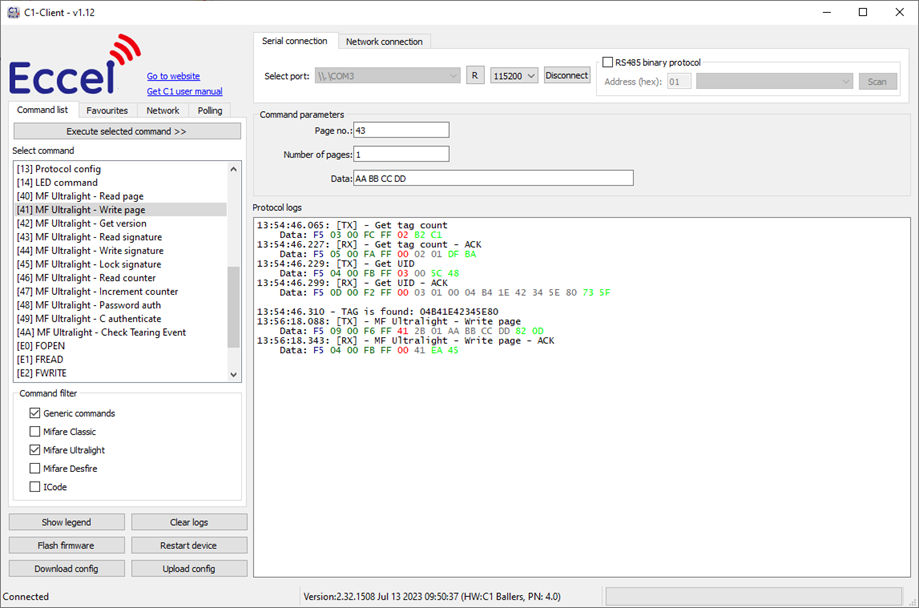
Step 2 – write page no. 43 and set a password to 0xAA BB CC DD:
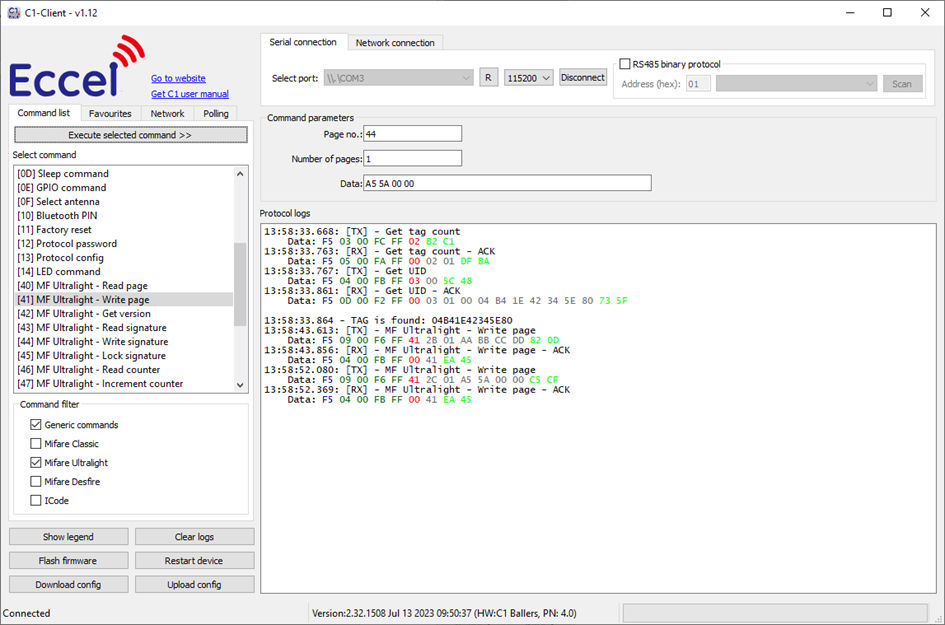
Step 3 – write page no. 44 and set the PACK (Password ACK) to 0xA5 5A:
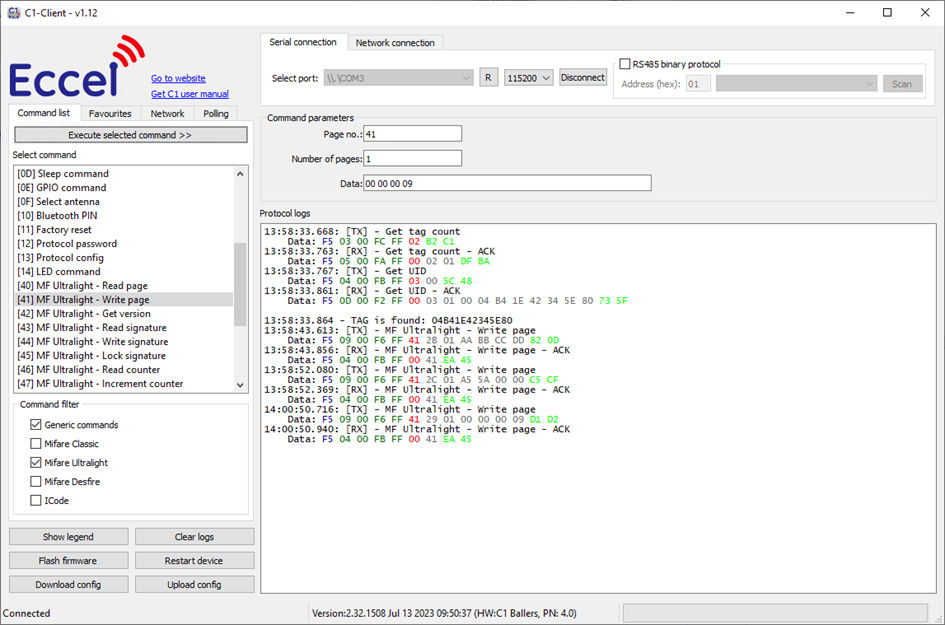
Step 4 – write page no. 41 and set the AUTH0 to 0x09.
Memory content after enabling the write protection:

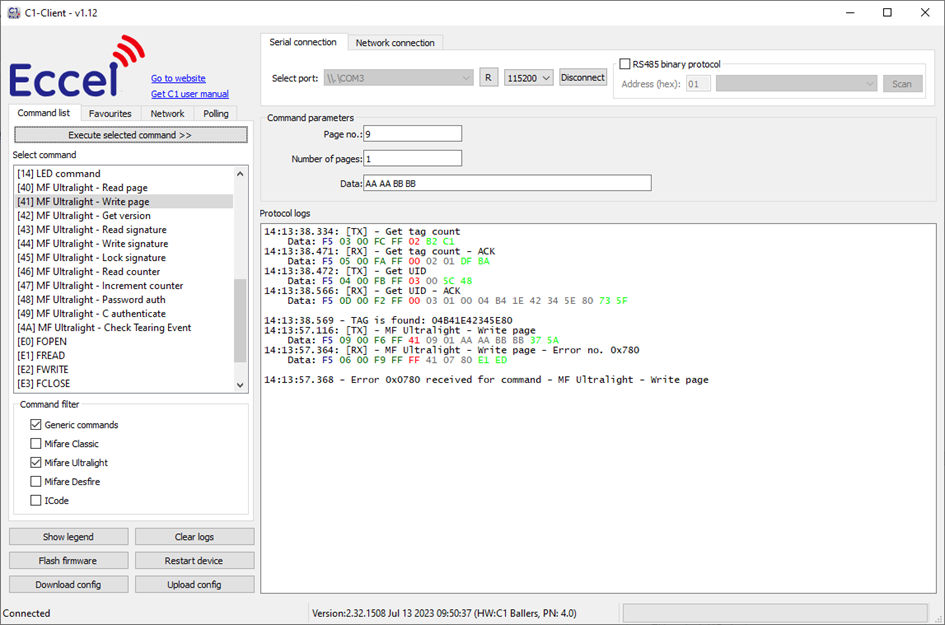
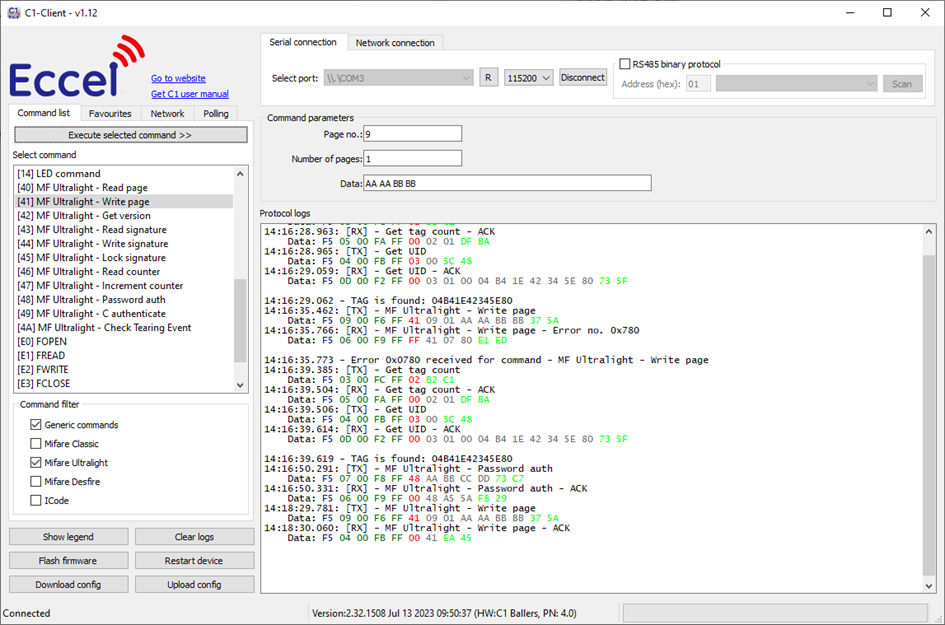
Now, every attempt to write a page no. 9 or with a higher address will lead to an error:
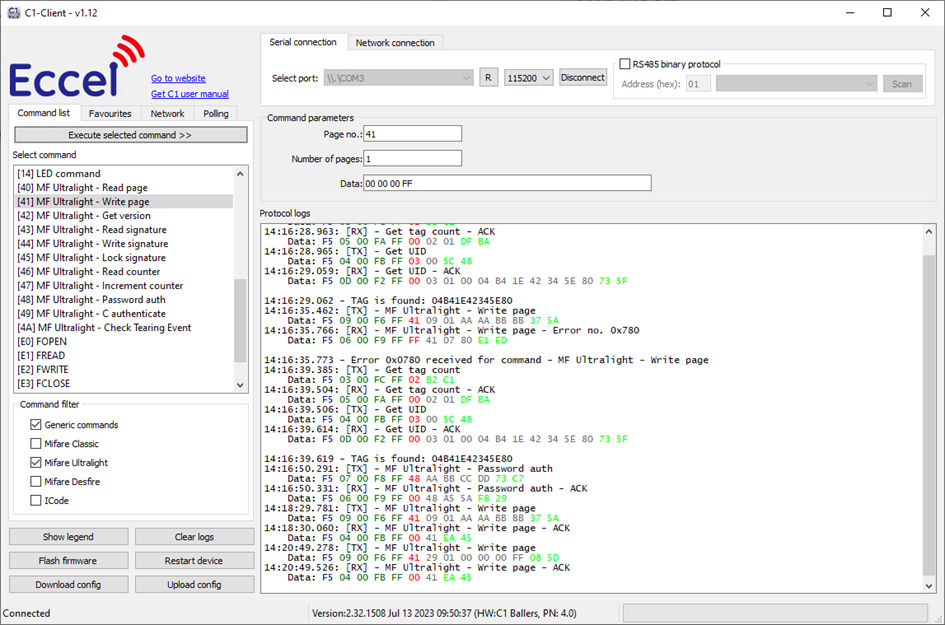
To write a page no. 9 we must execute the Password Authentication command. Before that, execute the Get tag count command to reset the RFID field and activate the tag again after the last error:
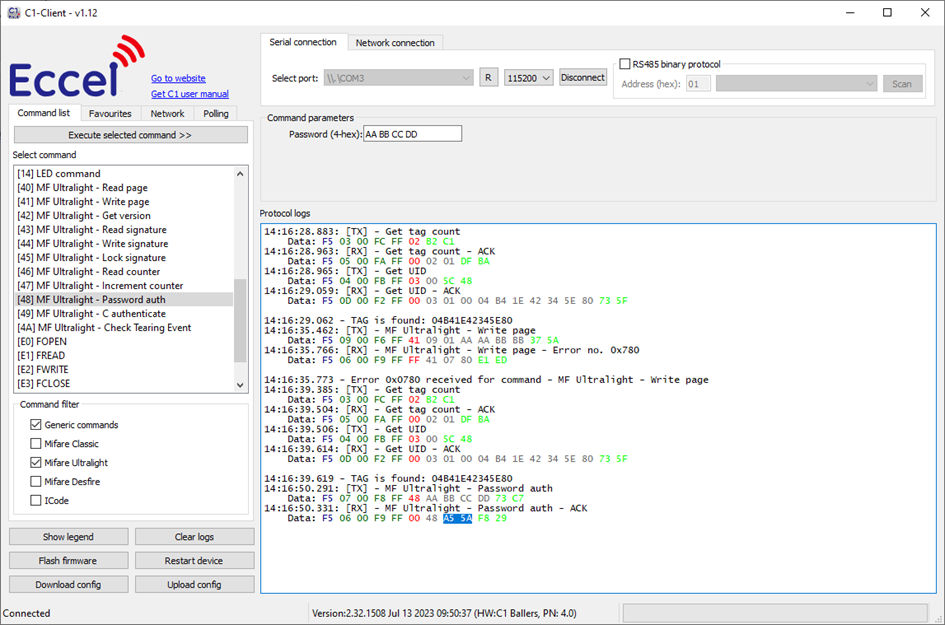
The previously set PACK = 0xA5 5A was received.
The tag is now unlocked, and we can write page no. 9:
To disable write protection, the AUTH0 has to be set to a page address which is higher than the last page from the user configuration. The password protection will be effectively disabled.
Please now, have a look at the ACCESS configuration byte in page no. 42 (for NTAG213):
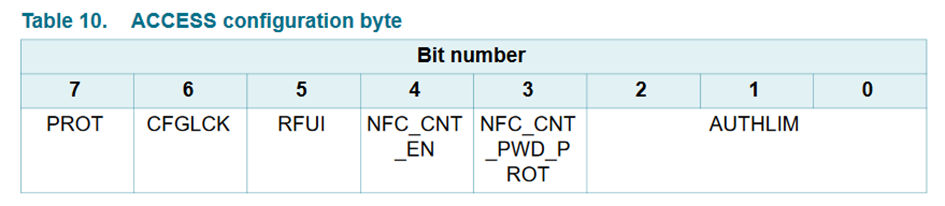
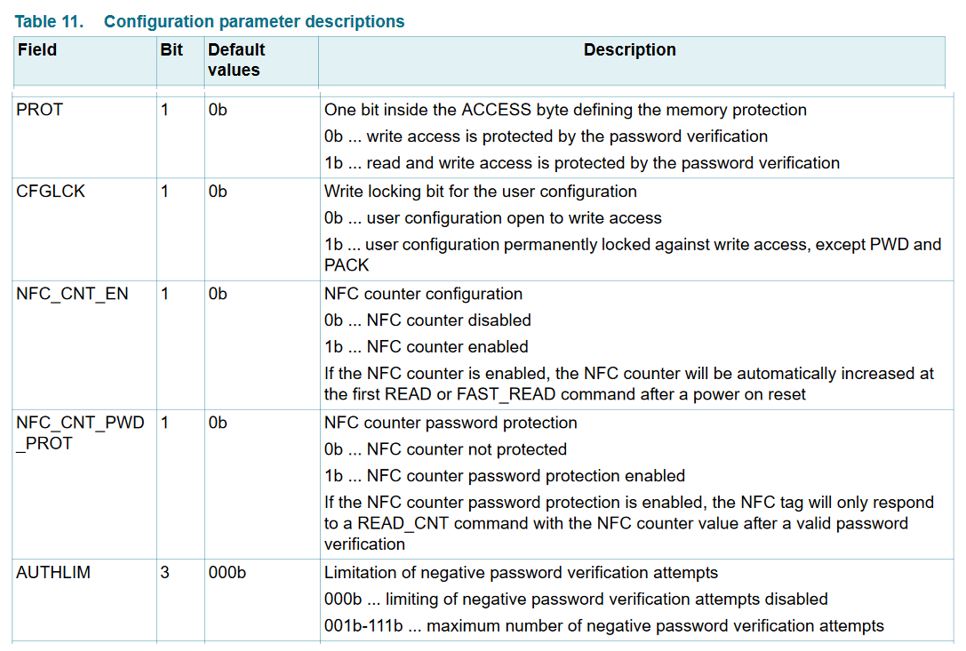
If the user wants to enable read and write protection then the PROT bit has to set to “1”, so the ACCESS byte should be: 10000000b = 0x80, this give the whole page no. 42 to be:
0x80 00 00 00.
Writing this value to the page no. 42 will enable the read/write protection for the pages defined by the AUTH0 parameter in page no 41.